Social Media
Food Photos 101: How to Take Food Photos Like a Pro
By Daniel Ruiz, former NYC chef June 2026 11 min read
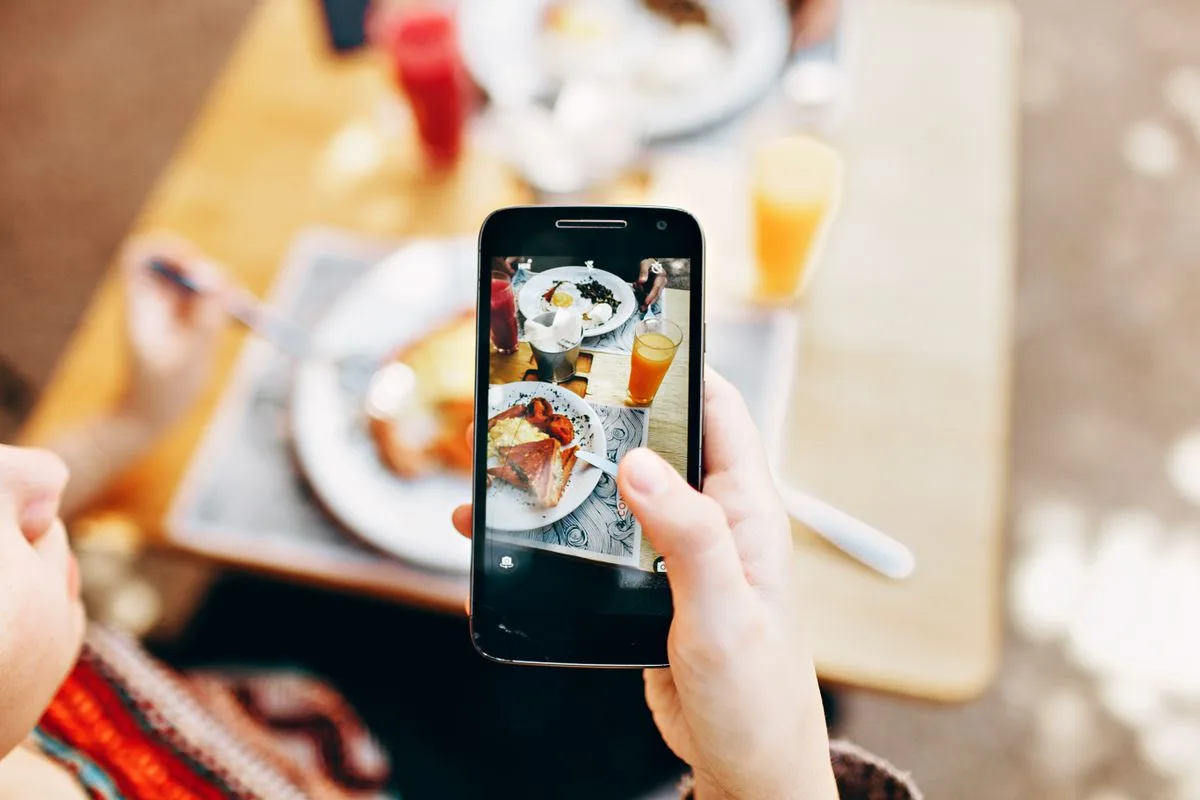
Here’s how to take food photos like a pro with nothing but your phone: shoot in soft daylight near a window (lights and flash off), wipe the plate clean and shoot it fresh, pick the right angle for the dish, keep the background simple, turn on your gridlines and tap to focus, then take lots of frames and finish with a light, honest edit. That’s the whole process, in order.
I spent over a decade in kitchens, line cook to executive chef, plating food I was proud of and then watching it get a sad, yellow, blurry snapshot under the heat lamps that did it zero favors. You don’t need a real camera, a studio, or a stylist to do better than that. You need a window, thirty seconds, and a handful of habits. So this is the plain, do-this-then-that version, written for someone who has never thought about a photo in their life. Take it one step at a time, you can run the whole thing between prep and service.
Step 1: Find the light (this is the whole thing)
If you only remember one thing from this entire guide, remember this: good food photos are really just good light. The fancy stuff, the angles, the editing, all of it is downstream of light. Get the light right and a phone from three years ago will make your food look incredible. Get it wrong and the best camera money can buy still gives you something sad and orange.
So before you do anything else, walk your plate over to a window. Daylight is your best friend, and it’s free. Not direct, blasting sun, that throws harsh shadows and blows out the highlights, but the soft, indirect daylight a foot or two back from the glass. Cloudy days are even better, a gray sky is basically a giant softbox. Find the spot in your space where window light falls gently across a surface and call it your photo corner.
Now the part nobody tells you: turn off your overhead lights, and never, ever use the flash. I know it feels backwards. Your instinct is more light equals a better photo. But the warm tungsten bulbs over your pass make food look yellow and dingy, and mixing them with daylight gives you that murky, two-colored mess where nothing looks right. Kill them. Let the window do the work. And the flash? On-camera flash flattens food, blows out the front, and casts an ugly hard shadow behind the plate. It is the single fastest way to ruin a shot. Off, always.
One more trick once you’ve got your window: notice which side the light is coming from. Light coming from the side or slightly behind the food is what gives it shape, texture, and that little glisten on a sauce or a seared edge. Light coming from straight in front (which is exactly what your flash does) flattens everything out. So set the plate down with the window off to one side, and you’re already most of the way to a photo that looks like someone who knew what they were doing took it.
Step 2: Prep the plate (and shoot it fast)
You plate food for a living, so this part is second nature, you just have to remember to do it for the camera too. The lens is brutally honest. It sees the smear on the rim, the drip of sauce, the one limp herb you’d never send out. Before you shoot, give the plate the same once-over you’d give it on the pass.
- Wipe the rim. A clean white rim around the food reads as “professional” more than almost anything else. Keep a folded towel and a damp corner handy and wipe every plate before it goes in front of the lens.
- Fix the garnish. Stand the herbs up, nudge the protein to the front, brush the crumbs off, make the hero of the dish the obvious hero. Small tweaks, big difference.
- Add a little freshness. A light brush of oil on a piece of meat, a tiny spritz of water on greens or fruit, a final pinch of flaky salt or a fresh herb on top right before the shot. It catches the light and reads as “just made.”
And here’s the one that trips everyone up: shoot it the second it’s ready. Hot food has a clock on it. Ice cream is melting, the foam is falling, the sauce is filming over, the greens are wilting, the steam you wanted is gone. A perfect plate looks tired within a couple of minutes. Have your phone open, your light set, and your angle figured out before the food lands, so all you’re doing is dropping the plate and shooting. Treat it like a fire ticket, fast and decisive, then send it.
Step 3: Pick the angle for the dish
There are really only three angles you need, and the dish tells you which one to use. You don’t have to overthink it, just match the angle to the shape of the food.
Overhead (straight down, the “flat lay”) is for anything that lives on a flat plane: pizzas, bowls, a spread of small plates, a beautifully arranged board, soups, anything where the design is on top. You’re showing the layout, like a map of the dish.
45 degrees (the “sitting at the table” angle) is your everyday workhorse, the way the food looks when you sit down in front of it. It works for most plates, burgers, pasta, breakfast, a composed entrée, because it shows both the top and a bit of the side. When in doubt, shoot 45.
Straight-on (eye level) is for anything tall, where the height is the story: a stacked burger, a layered cake, a pour of a cocktail, a tower of pancakes, a glass of something with great color. Get the lens level with the food and let it show off how tall and built-up it is.
| If your dish is… | Shoot it… | Why |
|---|---|---|
| A bowl, pizza, flat plate, or a spread | Overhead | The design is on top, so show the whole layout like a map. |
| A burger, pasta, entrée, most everyday plates | 45 degrees | Looks the way it does when you sit down to eat, the safe default. |
| A tall burger, layered cake, drink, stacked pancakes | Straight-on | Height is the story, so get level and show it off. |
Not sure? Take one of each and decide later. It costs you nothing but ten seconds, and you’ll quickly learn which angle your menu wants.
Step 4: Set a simple, uncluttered background
The food is the star. Everything else in the frame is a distraction fighting it for attention, so your job is to clear the stage. The simpler the background, the more the food pops.
You don’t need props or a styled set. A plain wood table, a sheet pan, a neutral linen, a piece of slate, a clean section of your counter, any calm, even surface works. Watch the edges of your frame and clear out the clutter: the ketchup bottle, the bunched-up napkin, the salt shaker, the random hand reaching in, the busy patterned plate that pulls your eye off the food. If it isn’t helping the shot, get it out of the shot.
A couple of gentle props can add life once you’re comfortable, a fork resting at the edge, a folded napkin, a glass of wine softly out of focus behind the plate, a few raw ingredients hinting at what’s in the dish. But add them on purpose, one at a time, and never let them crowd the food. When you’re starting out, “clean and empty” beats “busy and styled” every single time. Less is genuinely more here.
Step 5: Set up your phone the right way
Your phone is already a great camera, you’re just probably not using a few settings that make a real difference. None of this is technical. Two minutes, once, and it becomes habit.
- Turn on the gridlines. Dig into your camera settings and switch on the grid, those two-by-two lines across the screen. They help you keep things straight and they’re the key to composition in the next step. Leave them on for good.
- Tap to focus. Tap the screen right on the part of the food you want sharpest, usually the front, the hero. Your phone will focus there and meter the light off it instead of guessing.
- Drag to set the exposure. After you tap, there’s a little slider (usually a sun icon) next to the focus box. Drag it down a touch if the photo looks blown out and washed, up a touch if it’s too dark. You’re aiming for true-to-life, where the food looks the way it does to your eye.
- Get close, but don’t pinch-zoom. Move your whole body and the phone toward the food instead of zooming with your fingers. Pinch-zoom on most phones is just a digital crop, it throws away detail and makes everything grainy. Physically step in.
- Steady your hands. Tuck your elbows into your ribs, take a breath, and gently tap the shutter (or use a volume button) so you don’t jab the phone. Blur is the silent killer of phone food photos, and it almost always comes from a shaky hand. Brace yourself like you’re about to make a clean knife cut.
That’s your kit. No tripod, no lens, no app, just a phone you already own, set up the way it should have come out of the box.
Shooting your own food between rushes?
That’s a great place to start, and honestly more than most owners do. If you’d rather hand the photos and the posting to someone who’s actually plated food on the line, that’s exactly what we do.
Step 6: Compose with the rule of thirds
Remember those gridlines you turned on? Here’s what they’re for. There’s a simple idea photographers lean on called the rule of thirds: instead of jamming your subject dead center, place it along one of those grid lines or where two of them cross. Put the hero of your dish a little off-center, and the photo instantly feels more natural and alive than a stiff, centered snapshot. It’s the difference between a photo that looks “taken” and one that looks “composed,” and it takes zero extra effort once the grid’s there.
The other half of composition is negative space, the empty, calm area around the food. A little breathing room makes the dish feel intentional and gives your eye somewhere to rest. It’s also where your text or your logo can sit later if you’re making a post or a flyer. So don’t feel like you have to fill every inch of the frame. A confident plate with some quiet space around it almost always beats a cramped, edge-to-edge one.
Last composition tip: keep your lines straight. Use the grid to make sure the table edge or the rim of the plate isn’t tilting drunkenly across the frame. A slightly crooked horizon is one of those things you don’t consciously notice but that makes a photo feel “off.” Straighten up, and you’re done composing.
Step 7: Take lots of frames (this is free)
Here’s the secret pros rely on that beginners always skip: they take way more shots than they keep. Nobody nails it on the first frame, and the great thing about a phone is that an extra photo costs nothing. So don’t take one careful shot and walk away, take a dozen and pick the best one later.
While you’re shooting, work small variations so you give yourself real options:
- Shoot the same plate from all three angles, overhead, 45, straight-on, so you can choose after.
- Slide the plate an inch or two so the light hits it differently, then shoot again.
- Take a few wider and a few closer, some with breathing room, some tight on the texture.
- Nudge the garnish, add the spritz, drop the flaky salt, and shoot the “fresher” version.
It feels like overkill in the moment, and it’s the single habit that most separates photos that look pro from photos that look like a snapshot. You’re not being indecisive, you’re giving your future self a great photo to pick from. Then delete the rest, no one ever has to know how many it took.
Step 8: A quick, honest edit
Almost every good food photo gets a light edit, and you can do the whole thing in your phone’s built-in Photos app in under a minute. No special software. The goal is to make the food look the way it looked in real life, mouth-watering and true, not to turn it into a cartoon. A few honest nudges, in this order:
- Crop and straighten first. Tighten the frame, fix any tilt, and use the crop to put the food on a third if you didn’t quite nail it while shooting.
- Nudge brightness and contrast. Bring the photo up a touch if it’s dim, add a little contrast so the food has depth and pop. Small moves, you’re polishing, not rebuilding.
- Fix the warmth. If the photo looks too blue and cold or too yellow and dingy, adjust the warmth slider until the white plate actually looks white and the food looks like food.
And now the two rules that matter most, the ones that separate a clean edit from an obvious one. Don’t crank the saturation, and don’t bury it under a heavy filter. I get the temptation, a slider that makes the colors louder feels like it’s helping. It isn’t. Oversaturated food looks fake and a little gross, radioactive cheese, neon tomatoes, glowing salmon, and people can smell a too-processed photo from a mile off. A heavy preset filter does the same thing. The food you actually plated is better than any filter. Your job in editing is just to wipe the window clean so people can see it, not to repaint it. When in doubt, do less.
Common mistakes to avoid
If your photos aren’t landing, it’s almost always one of these, and every one is an easy fix:
- Shooting under overhead lights or with the flash. The number one killer. Yellow, flat, harsh. Move to a window, lights off, flash off.
- Letting the food die first. A melted, wilted, filmed-over plate can’t be saved in editing. Have everything set and shoot it fresh.
- A messy plate or a cluttered background. Wipe the rim, clear the frame. The lens forgives nothing.
- Pinch-zooming instead of moving in. It makes everything grainy. Step closer with your whole body.
- One shaky shot and done. Brace your elbows, take twelve, pick the best.
- Oversaturating and over-filtering. The fastest way to make great food look fake. Keep the edit honest and light.
None of these take talent to fix. They take a window, a clean towel, and the patience to take a few extra frames. You already do harder things than this before noon.
The before-you-shoot checklist
Here’s the whole process boiled down to something you can run through in thirty seconds before you drop a plate in front of the lens. Tick the boxes as you go, and hit “Save as PDF” to keep it or print it and tape it up in your photo corner. No email, no catch, it’s yours.
Before-you-shoot checklist
That’s the entire craft, in order, on one card. Run it a few times and it stops being a checklist and becomes muscle memory, the same way plating did. For the deeper styling and craft side, the props, the color, the storytelling, see my broader food photography tips for restaurant owners. And once you’ve got a folder full of photos you’re proud of, here’s where to actually use them: restaurant social media post ideas and a beginner’s guide to restaurant Instagram marketing.
Key takeaways
- Light is everything. Shoot in soft daylight by a window, lights and flash off.
- Shoot fresh and fast, with a clean plate, before the food tires out.
- Match the angle to the dish: overhead, 45 degrees, or straight-on.
- Set up your phone: gridlines on, tap to focus, step in, hold steady.
- Take lots of frames, then edit light and honest, never oversaturate.
Frequently asked questions
How do I take good food photos with just my phone?
Shoot in soft daylight near a window with your overhead lights and flash turned off, wipe the plate clean and shoot it fresh, pick the angle that fits the dish, keep the background simple, turn on gridlines and tap to focus, take lots of frames, and finish with a light edit. A modern phone is more than enough, the light and the habits matter far more than the camera.
Why do my food photos look yellow or dull?
Almost always because you’re shooting under warm overhead bulbs or using the flash, which make food look yellow, flat, and dingy. Turn those off, move the plate to soft window daylight, and the color problem usually fixes itself. A quick warmth nudge in editing can clean up whatever’s left.
What’s the best angle for food photography?
It depends on the dish. Shoot overhead for bowls, pizzas, flat plates, and spreads where the design is on top. Shoot at 45 degrees, the way it looks when you sit down, for most everyday plates. Shoot straight-on at eye level for tall food like stacked burgers, layered cakes, and drinks. When unsure, take all three and pick later.
Should I use my phone’s flash for food photos?
No, never. On-camera flash flattens the food, blows out the front of the plate, and throws a hard, ugly shadow behind it. It’s the single fastest way to ruin a food photo. Use soft natural daylight from a window instead, and turn the flash off.
Do I need to edit my food photos?
A light edit helps almost every shot, and you can do it in your phone’s built-in Photos app in under a minute: crop and straighten, nudge brightness and contrast, and fix the warmth. The key is restraint, don’t crank the saturation or bury it under a heavy filter, or the food starts to look fake. Aim for true-to-life, not cartoonish.
How do restaurants get crave-worthy food photos without a photographer?
By treating it like a station: set your light by a window, prep and wipe the plate, shoot it the second it’s ready, take plenty of frames, and edit lightly. Most great-looking restaurant photos start as phone shots done with good light and good habits. When you want it handled consistently, or styled and posted for you, that’s where bringing in help pays off.